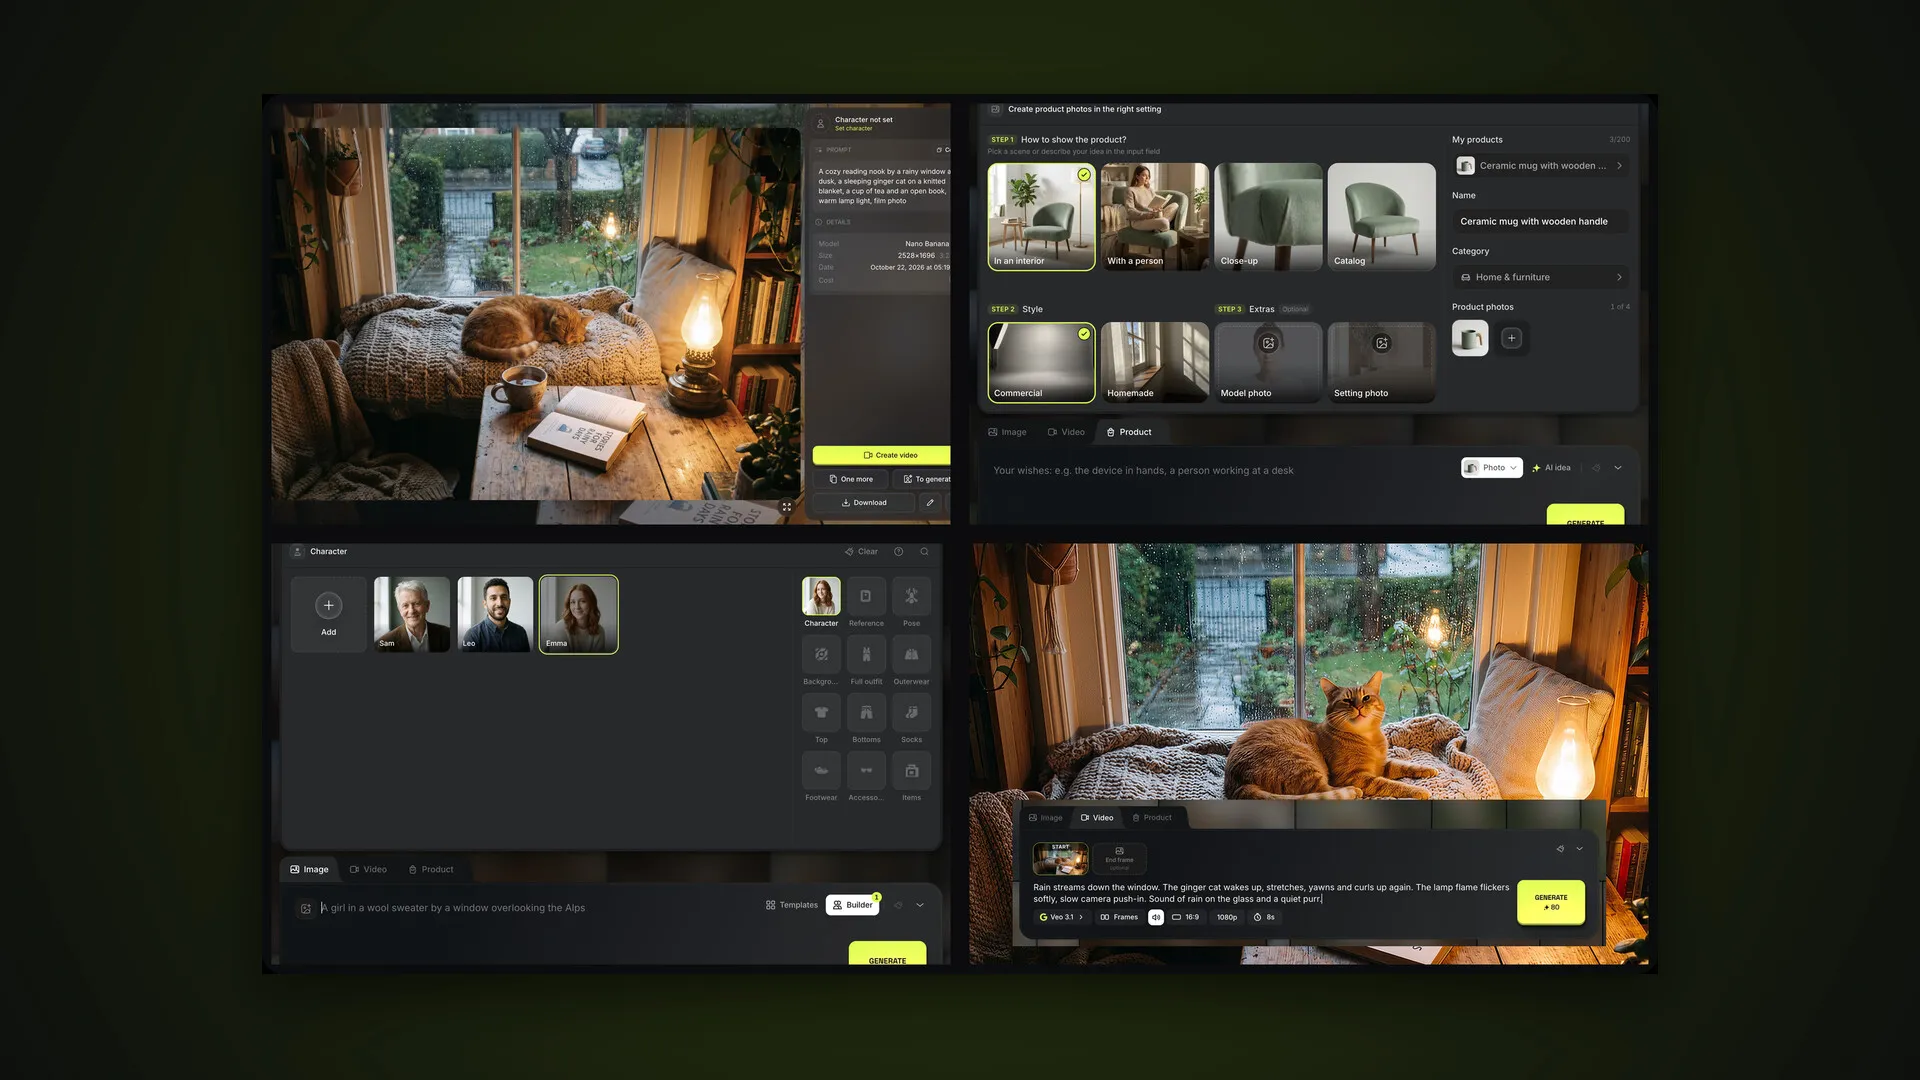

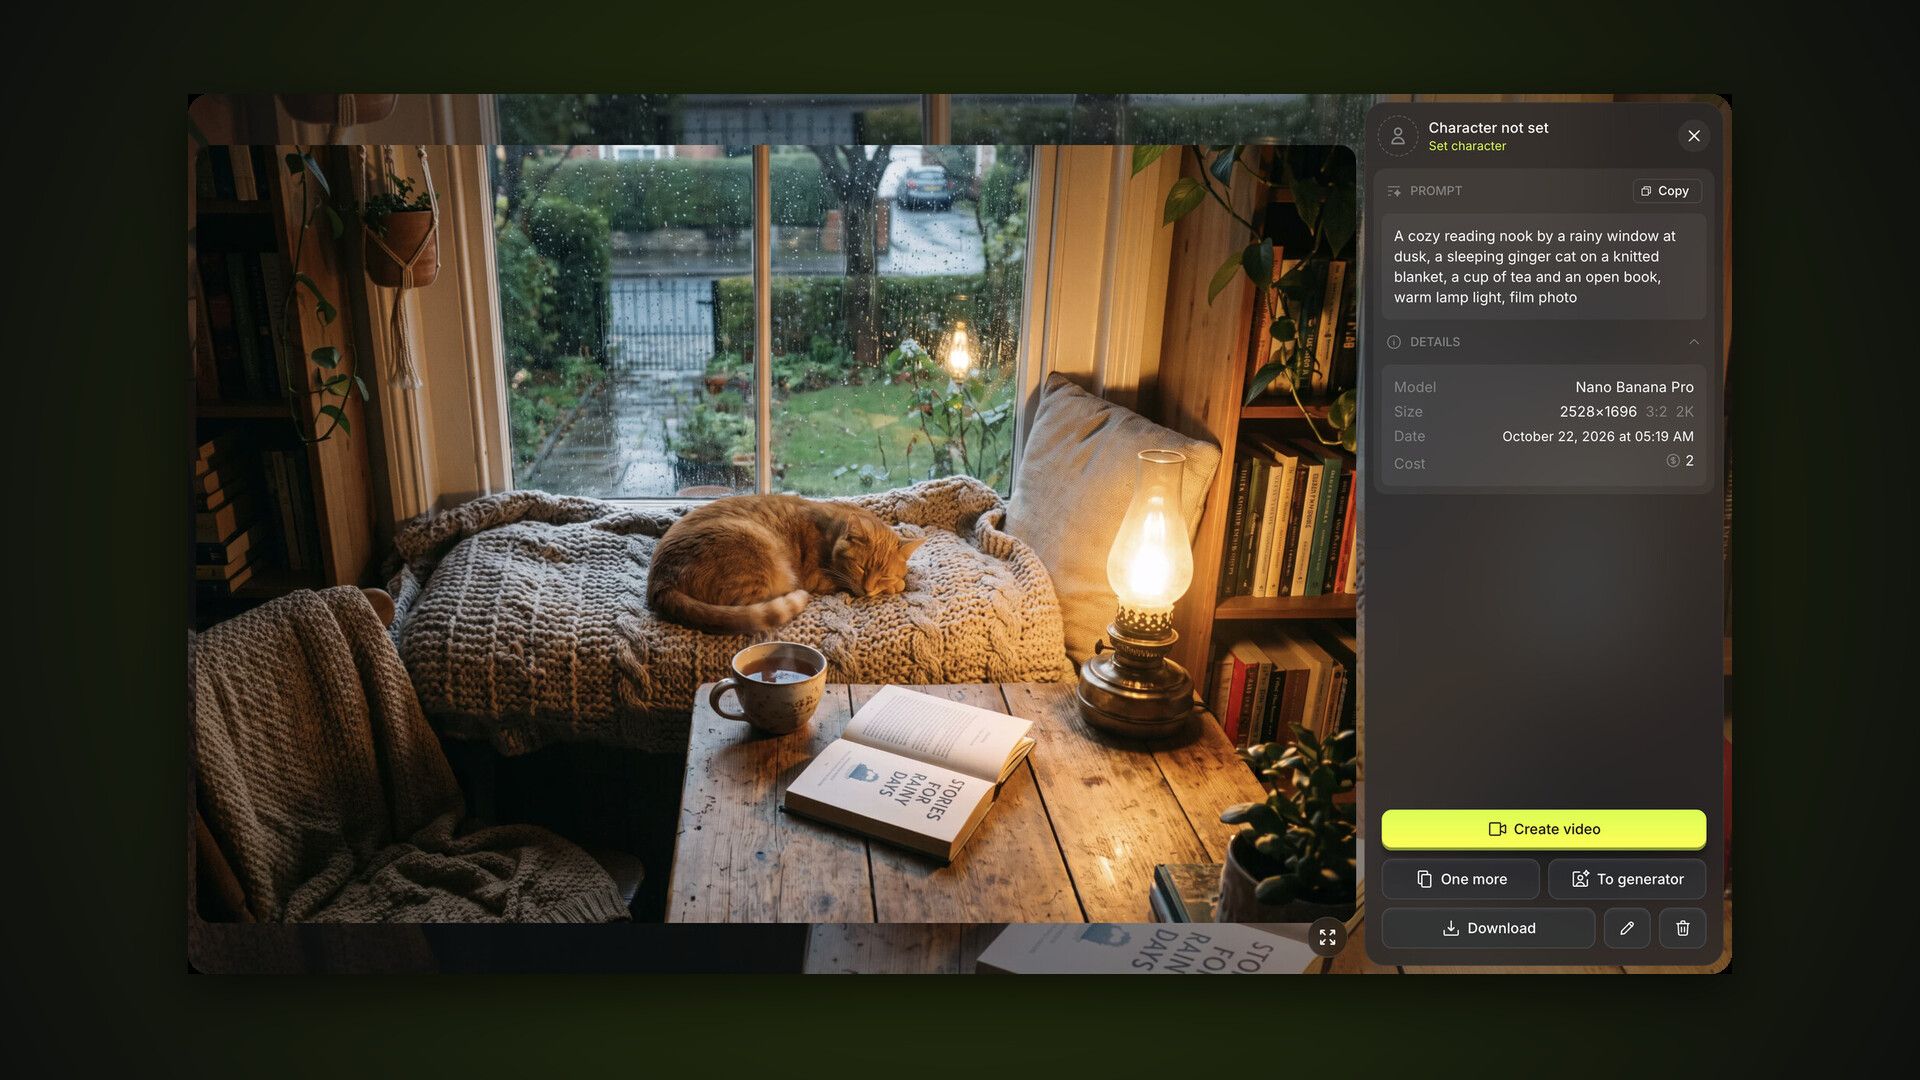
The generator is the heart of AI2Face: the composer for your request sits at the bottom, and the feed with all your images and videos fills the screen above it. This is part 1 of the AI2Face user guide, and it walks through the Image tab from your first prompt to editing a finished shot.
How the AI2Face image generator is laid out
Open Generate in the top menu. The composer at the bottom of the screen has three zones:
- tabs on top — Image, Video and Product, each with its own models and settings;
- the prompt field — your request, with “+” for photos on the left and Templates and Builder on the right;
- the bottom row — model, aspect ratio, resolution, number of variations and the Generate button with the cost in credits.
You can collapse the composer with the arrow on the right to see more of the feed, then expand it again. Your text, attachments and settings are saved in the browser, so nothing is lost when you reload the page.
How to write a prompt
Describe what you want to see: the subject or scene, the setting, the lighting, the mood and the style. A “what → where → how it’s shot” order works well:
A cozy reading nook by a rainy window at dusk, a sleeping ginger cat
on a knitted blanket, a cup of tea and an open book, warm lamp light, film photo
Models understand many languages, but English prompts usually capture photographic style most precisely. A prompt can be up to 20,000 characters long — plenty for a detailed brief.
For ready-made wording, see our collections of image prompts and photoshoot prompts.
Templates: a ready-made style in one click
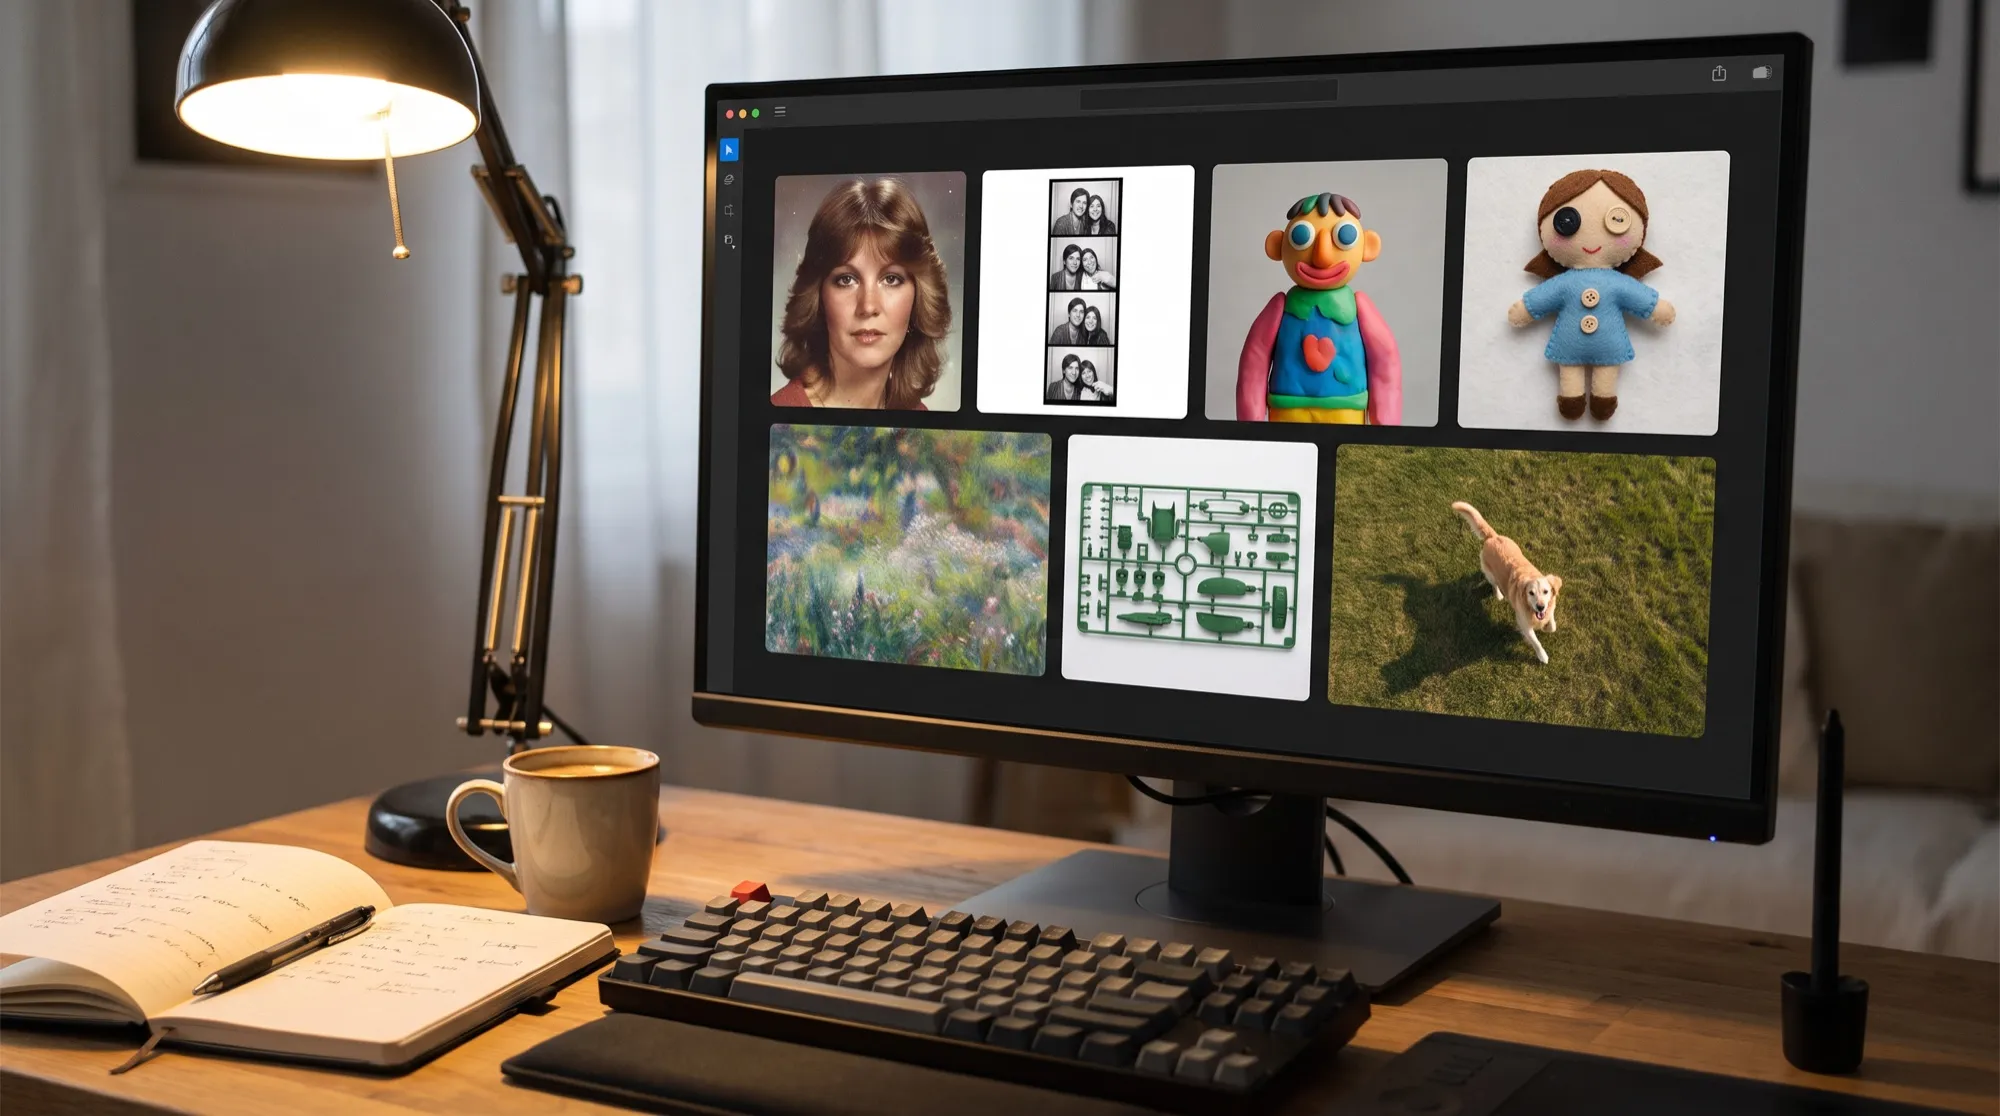
The Templates button opens a catalog of ready-made styles and scenes: ’70s and ’80s portraits, photo booth, drone view, anime, stickers, character sheets and more. The catalog is split into Portrait, Art styles, Figures & stickers, Guides & infographics and Design, with search at the top.
Clicking a card fills in the prompt and the aspect ratio. Some templates need your photo — for example, to turn yourself into a figurine or a sticker. In that case AI2Face will prompt you to attach a shot via “+”.
How to attach photos to your prompt
Click “+” to the left of the prompt field. A panel opens with these tabs:
- Uploaded — your own photos: upload new ones or drag files straight into the panel;
- Generated — everything you’ve already created in AI2Face;
- References — a catalog of sample shots by theme: LinkedIn, Instagram, travel, fitness, selfies and more;
- Builder and Clothing — backgrounds, poses and items from your asset library;
- Characters — your characters, to put specific people in the shot.
Attached photos appear above the prompt field, and the counter next to them shows how many images will go to the model and how many it accepts: up to 14 for Nano Banana Pro. In the prompt you refer to photos with tags: @1, @2 by number, and characters by name. Putting several people in one shot is covered in detail in our guide to multiple characters and @ tags.
You can also attach an image from the feed without the panel: drag its tile into the composer, or open it and click To generator.
How to choose a model
The button with the model name in the bottom left opens the list. AI2Face currently offers 10 image models: Nano Banana Pro, Nano Banana 2.1, Nano Banana 2, Nano Banana 2 Lite, Nano Banana, GPT Image 2.5 in Flare and Sunburst versions, Seedream 5.0 Pro, Grok Image 2 and Wan 2.7. Each comes with a short description and a Premium, New or Fast badge.
Not sure which to pick? Start with the default. For photos of people, use Nano Banana Pro; for edits and text inside images, GPT Image 2.5 Sunburst; for quick drafts, Nano Banana 2 Lite or GPT Image 2.5 Flare. We compared the models on identical prompts in Nano Banana vs GPT Image. The Subscription page shows which models your plan includes.
Aspect ratio, resolution and number of variations
To the right of the model are three shot settings.
Aspect ratio. Auto lets the model decide; the other options range from 1:1 squares to 21:9 and 8:1 panoramas and 9:16 and 1:8 verticals. The set depends on the model.
Resolution. 1K, 2K or 4K. 2K is available on the Basic and Pro plans, 4K on Pro. Higher resolution costs more, and the price on the button updates instantly.
Number of variations. The “1/20” counter sets how many images to create per run; the second number is your plan’s limit. Variations help when you’re exploring an idea: it’s easier to pick the best of four than to rerun one at a time.
Some models add extra settings to this row: detail level and transparent background for GPT Image, thinking depth and web search for Google’s models.
Generating, the queue and errors
Click Generate. Credits are deducted, the job joins the queue, and an animated tile appears at the top of the feed. While it renders, you can prepare your next request; how many jobs run in parallel depends on your plan.
You can cancel a queued job and get your credits back. If the model doesn’t respond, the tile shows an error and your credits are refunded automatically. The error window shows the model, prompt and attached photos, and the Edit button sends them back to the composer so you can try again.
The feed: filters, selection and folders
The feed collects all your images and videos, newest first. The bar above it has:
- “?” — the generator tutorial, a link to this guide and keyboard shortcuts;
- the filter — by character, product, model, type (photo or video) and period;
- the slider — tile size.
The “⋯” menu on a tile holds quick actions: select, move to folder, create an image, video or product from the shot, edit, download and delete.
Select several tiles with ⌘+click (Ctrl+click on Windows) and a range with Shift+click. You can then download the selection as an archive, move it to a folder or delete it. Folders for generated content are created in Assets — see the guide to assets and folders.
The viewer: download, repeat, refine
Clicking a tile opens the viewer: the image on the left, and on the right the prompt with a Copy button, the model, size, date and cost. The buttons at the bottom:
- Create video — opens the Video tab with this image as the start frame;
- One more — runs the same generation again;
- To generator — attaches the image to your prompt as @1 for editing;
- Download — the original at full resolution;
- pencil — Edit: sends the prompt, photos and settings back to the composer;
- bin — delete.
At the top of the window, Set character links the image to a character so it shows up when you filter the feed by that character.
How to edit an image with a prompt
An edit is just another generation with your image attached. Open the image, click To generator and describe what to change and what to keep:
Say explicitly what must stay: “keep the cat, the lamp and the book”. Otherwise the model may redraw the whole scene. More techniques are in our guide on how to edit photos with AI.
Generator keyboard shortcuts
The feed and the viewer are faster with a keyboard. The list is always one click away: “?” → Keyboard shortcuts.
| Key | Action |
|---|---|
| ⌘ / Ctrl + click | select multiple |
| Shift + click | select a range |
| ← → | browse images in the viewer |
| D | download |
| E | edit |
| R | generate more |
| G | attach to prompt |
| F | full screen |
| Del | delete |
| Esc | close the viewer |
Bottom line
Your first image in AI2Face takes three steps: write a prompt or pick a template, check the model and aspect ratio, and click Generate. From there, the viewer and edits take over: To generator turns any shot into the basis for the next one, and Create video brings it to life. For portraits of the same person, create a character — see the characters part. If you need a clip, move on to video generation; for product photos and marketplace cards, head to the Product tab.
FAQ
How much does one image cost in AI2Face?
It depends on the model, the resolution and the number of variations: the exact cost in credits is shown on the Generate button before you start. You only pay for generations you launch, and failed ones are refunded.
Can I generate several variations at once?
Yes. The counter next to the resolution sets how many images to create per run. The maximum depends on your plan and is shown in the counter itself.
How do I edit an image I've already generated?
Open it and click To generator: the image is attached to your prompt as @1. Then describe what to change and what to keep — for example, “make it a winter evening, keep the cat and the lamp”.
What happens if a generation fails?
Your credits are refunded automatically, and a tile with the error stays in the feed. From there you can reopen the settings and try again, or delete the tile.
Does the generator work on a phone?
Yes. On a smartphone you get the same composer, feed and viewer, and you switch sections from the bottom menu.