







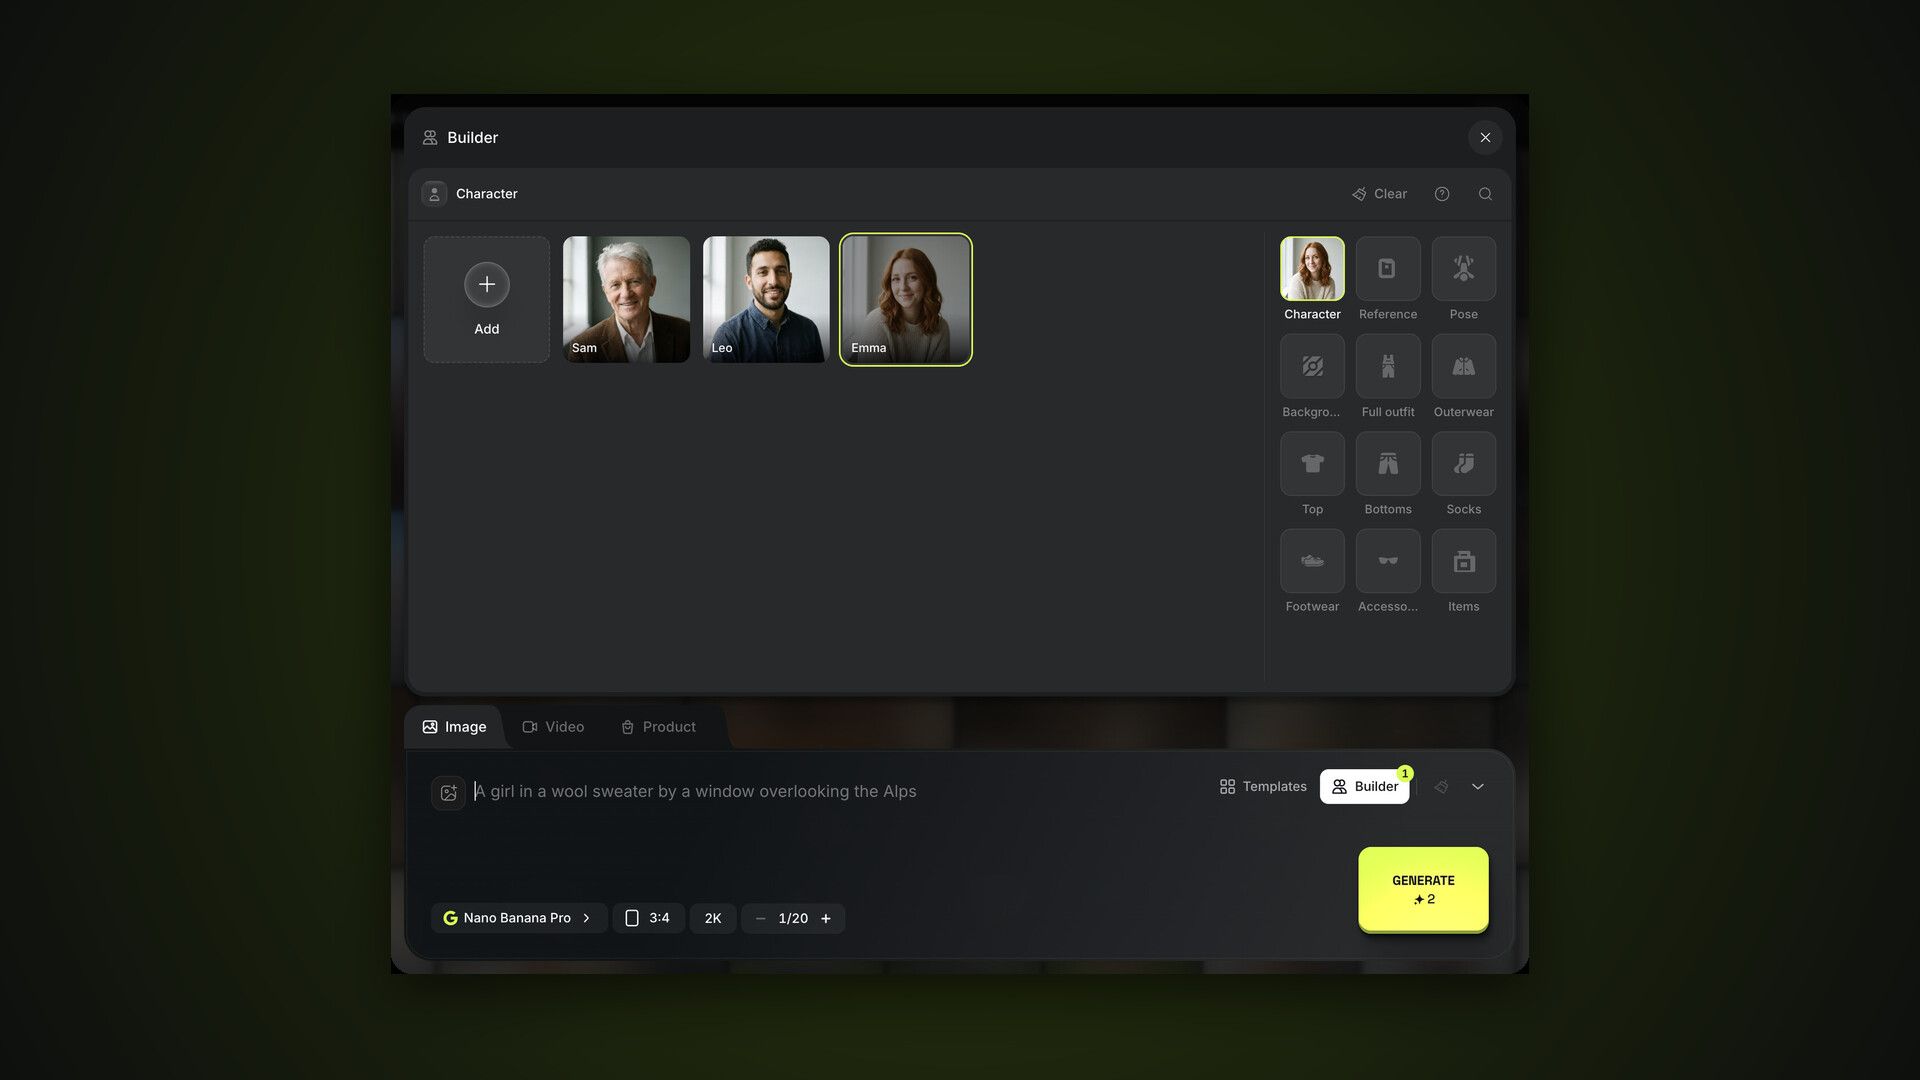
The Builder is a panel above the composer on the Image tab. Use it when you want “a shot like this sample, but with my character”, or to put a look together piece by piece: this pose, that background, your own jacket. This is part 5 of the AI2Face user guide. Characters for the Builder are created in the Characters section — see the previous part.
How to open the AI2Face Builder
Click Builder at the top right of the prompt field on the Image tab. The panel has two parts:
- on the right, the layer grid: Character, Reference, Pose, Background and eight clothing layers;
- on the left, the options for the selected layer: characters, a sample catalog or your uploads.
Click a layer tile to see its options; your choice appears right on the tile. Clicking an option again deselects it, and Clear resets the layer. The number on the Builder button shows how many layers are selected. The “?” button in the panel starts a short Builder tutorial.
The Character layer: whose face is in the shot
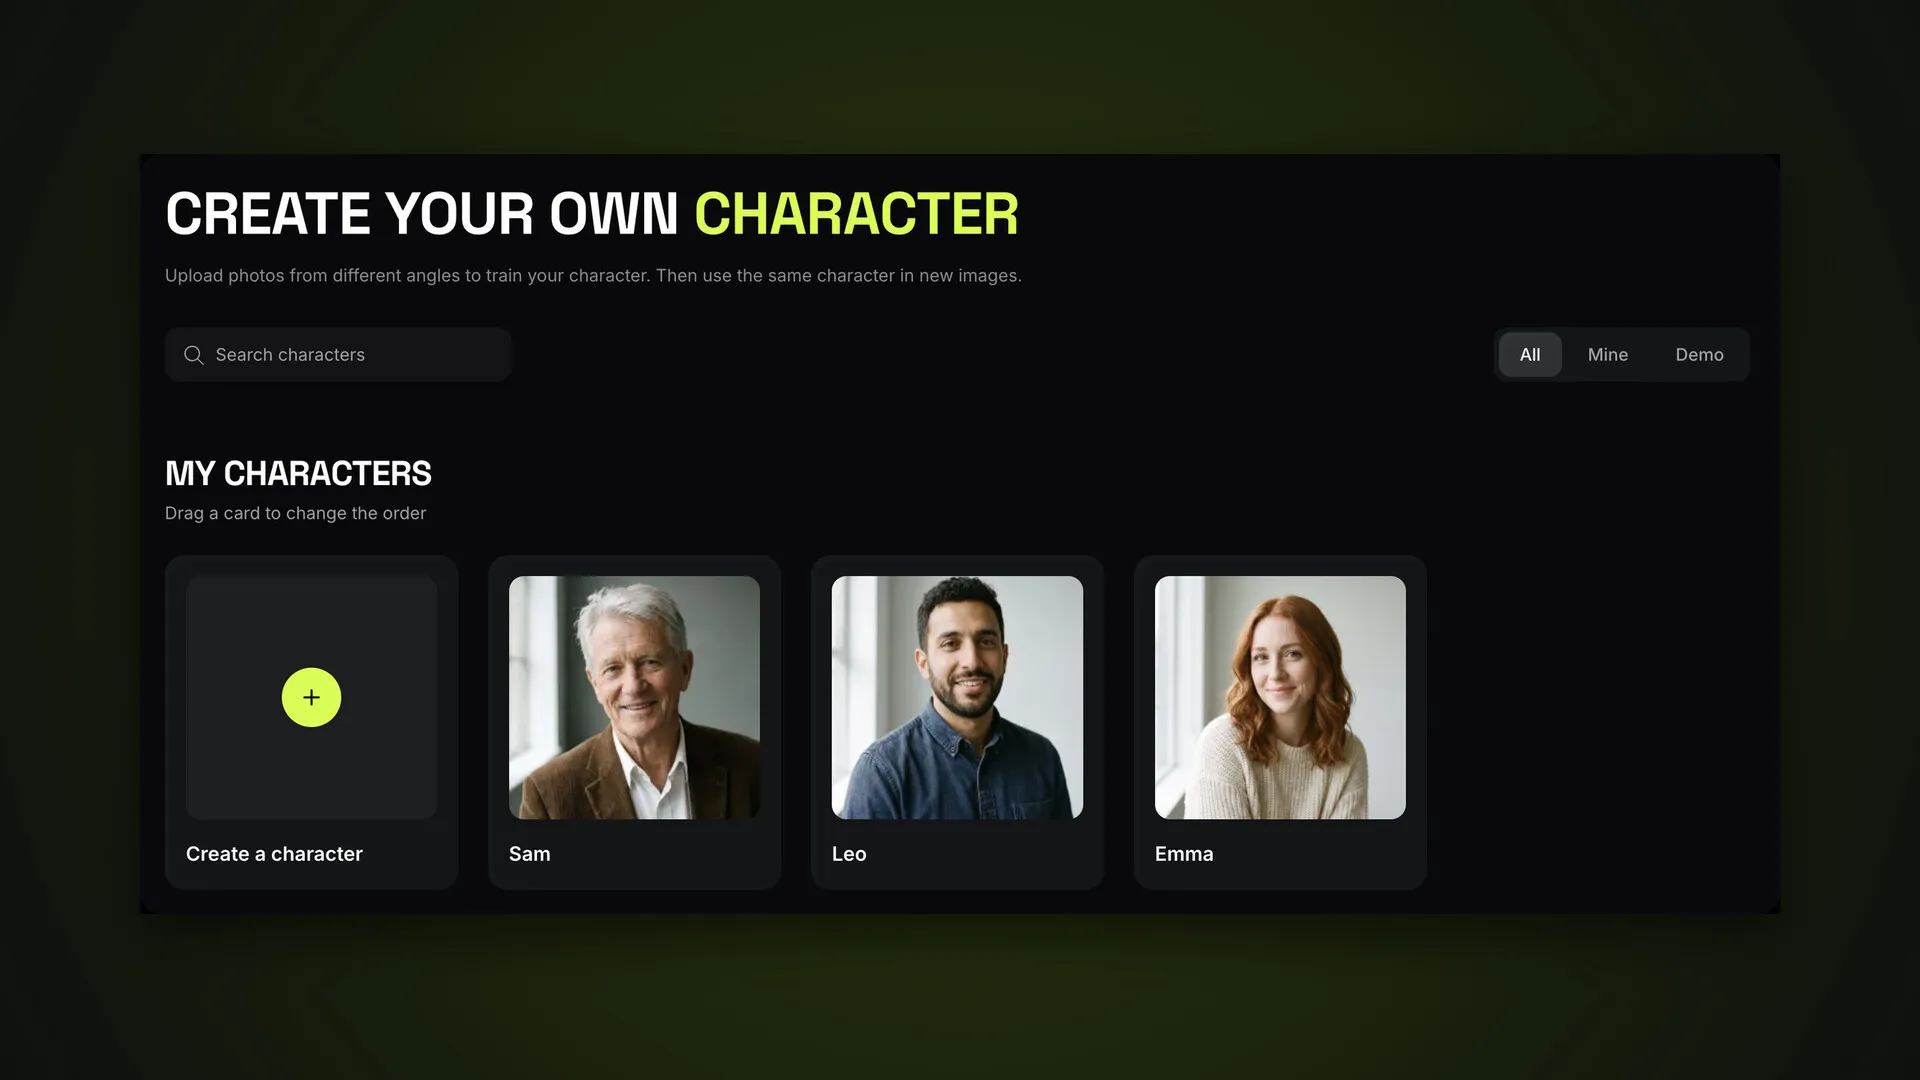
The Character layer is the face that stays in the shot. The grid shows your characters and demo characters, and the “+” tile creates a new one from a few photos. The order matches the Characters page, where you can rearrange cards by dragging.
To land in the Builder with the right character already selected, click Generate with this character on the character’s page.
The Reference layer: a shot from a sample
A reference is a sample for the shot: your character appears in the same outfit, pose, setting and style as in the reference. It’s the fastest route to a predictable result: pick a shot you like, and the model recreates it with your face.
The reference catalog is organized by theme: LinkedIn, Instagram, outdoor adventure, luxury, fitness, selfies, nightlife, beach, sport and more. At the top are All, Male and Female filters, and the Personal category keeps your own uploaded samples.
We picked Emma and a sample from the LinkedIn category and clicked Generate with an empty prompt:
The face and hair come from the character, while the pose, clothing, lighting and setting come from the sample. If you want something different from the sample — another clothing color, a smile — add it in the prompt field.
The Pose, Background and clothing layers
When there’s no ready-made sample, build the shot piece by piece.
- Pose — how the character stands or sits. You can take a pose from any photo: the model copies the body position, not the person.
- Background — the location: a studio backdrop, an interior, a street, a landscape.
- Clothing — eight layers: Full outfit, Outerwear, Top, Bottoms, Socks, Footwear, Accessories and Items. Accessories and Items take up to 4 options each; the rest take one.
Every layer has an Upload tile for your own sample and a gender filter. Everything you upload goes into your Assets library and stays available — the assets part shows how to sort your backgrounds and poses into folders. Uploading your own files is available on paid plans, and the overall limit for your images depends on your plan.
Do you need a prompt in the Builder?
No: the selected layers are enough to click Generate. The prompt field is for anything the layers don’t cover:
smiling, looking at the camera, soft golden hour light
AI2Face turns the layers into detailed instructions for the model — which image is responsible for what. So there’s no need to describe the clothing or background in the prompt if they’re already set in the layers.
The Builder and characters from “+”
The Builder works together with the “+” panel. If characters are attached via “+” → Characters, or the prompt contains @Name tags, the Builder character goes first in the list, and the background, clothing, pose and reference are sent to the model along with everyone. The same person selected in the Builder and in “+” takes up only one slot. Details in our guide to multiple characters in one shot.
Bottom line
The Builder is the shortest path to a shot with your character: select them in the Character layer, take a reference from the catalog and click Generate. When there’s no sample, build the shot from a pose, background and clothing, and use the prompt only for emotion and lighting. For photos of people, use Nano Banana Pro. Next in the guide: assets and folders — where your uploaded poses, backgrounds and clothing live.
FAQ
Do I have to write a prompt in the Builder?
No. The selected layers are enough to click Generate. Use text only for what the layers don't cover: emotion, lighting, details.
How is a reference different from a pose or background?
A reference is a complete sample: your character appears in the same outfit, pose, setting and style. Pose, background and clothing each control one part of the shot.
Can I upload my own pose or background?
Yes. Every layer has an Upload tile: the file is saved to Assets and stays available next time. Uploading your own files is available on paid plans.
How many accessories and items can I pick?
Up to 4 accessories and up to 4 items. The other clothing layers take one option each.
Does the Builder work with characters from “+”?
Yes. The Builder character goes first, the ones from “+” follow, and all of them can be referenced in the prompt with @Name tags.